A guide to connecting Google Analytics 4 (GA4) and Google Tag Manager (GTM) to your business website.
When it comes to running an online business, data serves as your compass in the ever-changing world of eCommerce, providing valuable insights into your audience’s online behaviour. Consider Google Analytics 4 and Google Tag Manager as your trusty first mates on this data-driven voyage, and this article is your map to get them up and running.
Setting up GA4 for your website.
If you already have a Google account, great. If not, you need to start by setting one up. Follow this link and begin by creating your Google business account. Once that’s complete, come back and you can move onto the next step.
RELATED: How to set up and update your Google Business Profile.
1. Create a GA4 Property.
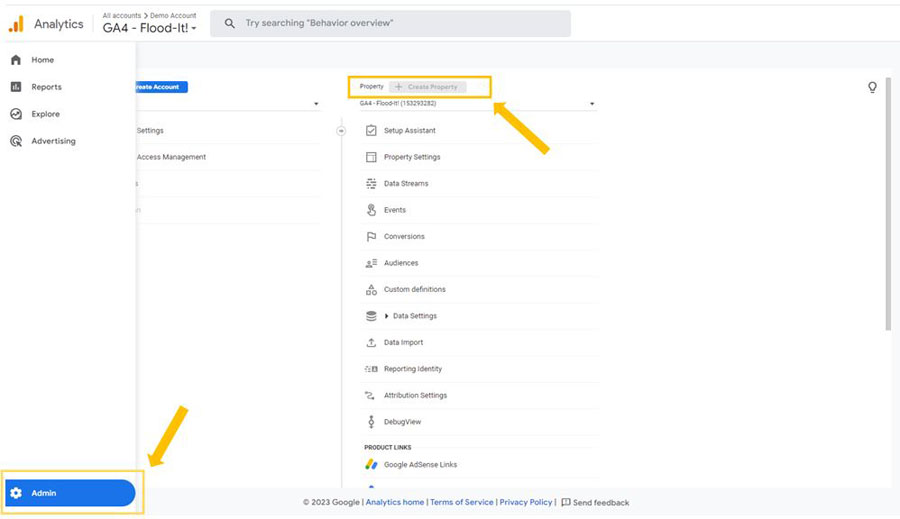
Sign in to your Google Analytics account or create one if you don’t have it. Once logged in, navigate to the Admin section in the sidebar on the left. Click on ‘Create Property’ and select ‘Web’.
Follow the prompts to provide information about your website, including the URL, property name, reporting time zone, currency and general information regarding your business objectives. When prompted, opt for ‘Get baseline reports’ to keep things simple.

2. Set up Data Streams.
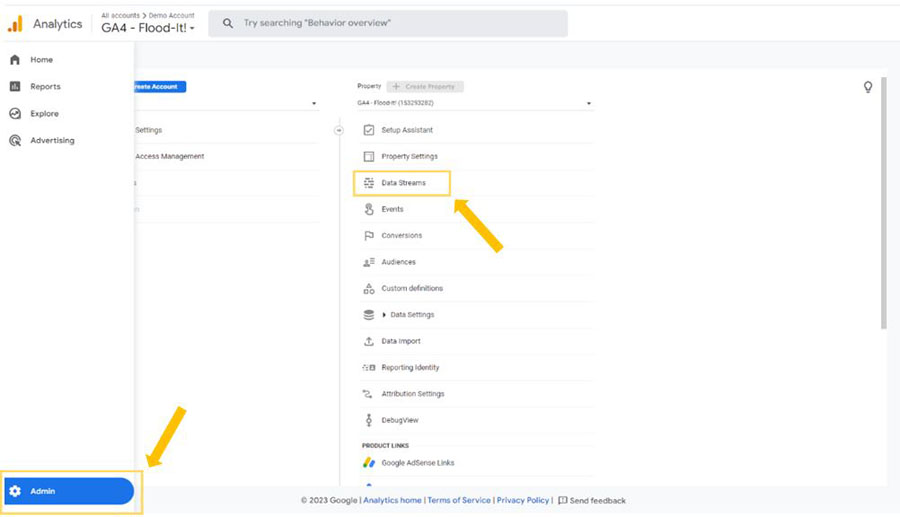
After creating the ‘Property’, you’ll need to set up ‘Data Streams’ for your website. A ‘Data Stream’ represents the source of the data you want to track, which is typically your website. To create a ‘Data Stream’, select your ‘Property’ and click on ‘Data Streams’ under the ‘Property’ settings.

Choose ‘Web’ as the source type and follow the instructions to complete the setup. Once you have your GA4 Tracking Code, you can move on to the installation.
3. Install the GA4 Tracking Code.
There are a few ways to install GA4 on your website and some are easier than others.
The options are:
- Using a Google Analytics integration or plugin (this is most relevant for WordPress users). Shopify has a built-in solution that can be found on the Shopify website at Step 3.
- Using Google Tag Manager (GTM)
- Or the more laborious route, installing with the GA4 native tracking code.
Using a plugin or the Shopify built-in method is definitely the ‘easiest’ way to install your GA4 tag, but it should be noted that using the Google Tag Manager route is best for a number of reasons:
- Simplicity: Google Tag Manager helps simplify the implementation of other tools including GA4
- Convenience: It reduces your reliance on developers as you can easily add or remove tags without having to change the website code every time
- Customisation: You can create custom events in GTM with any custom parameter, that you can later add to GA4 to ensure that you are tracking all important events to your business.
For these reasons, and the fact that it is generally considered best practice, let’s dive into Option 2 – using Google Tag Manager.
Prerequisites.
Before you begin, make sure you have the following:
- A Google Tag Manager Account: If you don’t have a GTM account, create one at https://tagmanager.google.com
- GTM needs to be installed on your website. See Google’s support guide here
- A Google Analytics 4 Property: Set up a GA4 Property in your Google Analytics account (as above). You’ll need the Measurement ID associated with this Property, which is found in the ‘Admin > Data Streams > Web Data Stream’ that you created earlier.
Once you have created your GTM account and installed it on your website, you can get started with setting up your tags.
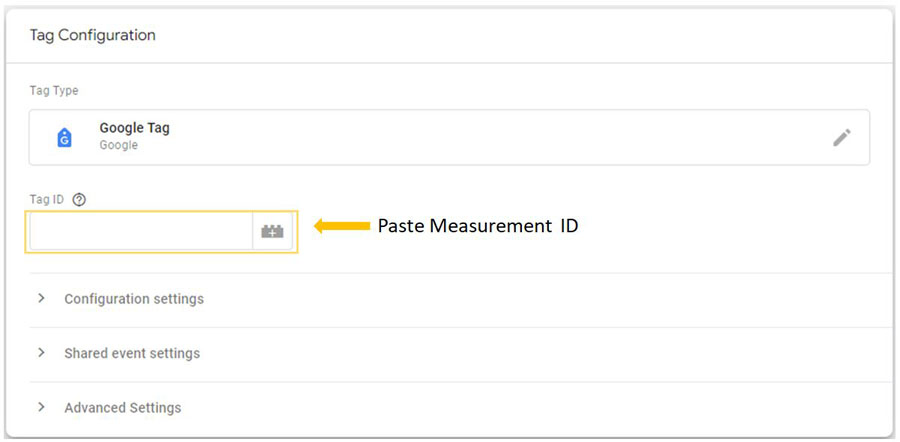
The first step is to create a container, which you’ll find detailed instructions on the process here. When you’ve created your first container, you’ll be directed to the overview window. On the left side bar go to ‘Tags > New’ and select ‘Google Tag’.

Then paste your Measurement ID (from your Property) in the box below:

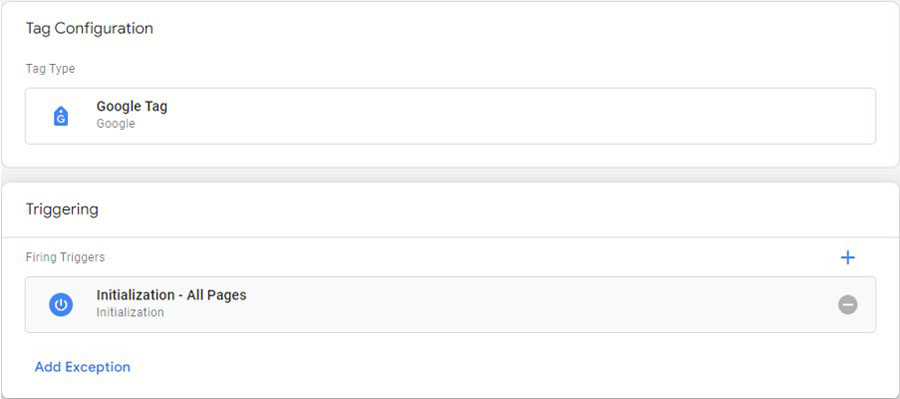
Underneath your ‘Tags’ box, you will see a ‘Triggering’ box. Click on it and select ‘Initializing – Pages’. Your Google Tag Configuration and Triggering should appear as follows:

The only thing left to do is to confirm that your tags are firing correctly. You’ll find Google’s easy to follow step-by-step guide here for the GTM process.
Alternatively, if you want to use the GA4 DebugView, it can be found in ‘Admin > DebugView’. Google’s support article also shows you how to ensure your tags are firing.
Now that you’ve set up your GA4 and Google Tag Manager, you’re ready to start tracking your data and boosting your business’ online performance.
For more information on how to analyse your data to optimise your website and improve conversion rates, check out our article here.
